Compliance Tracking & Certification of Correction
A step-by-step guide to tracking HPD/DOB violations, documenting your corrective work, and generating an official Certification of Correction to submit to the city.
What You Will Learn
- Open a property and view live HPD violations
- Open a violation and start a tracking record
- Add correction notes and upload evidence photos
- Create a self-fix maintenance ticket linked to the violation
- Mark the ticket completed after work is done
- Set the correction status to Resolved
- Generate, preview, and save the Certification of Correction as a PDF
Open Your Property Dashboard
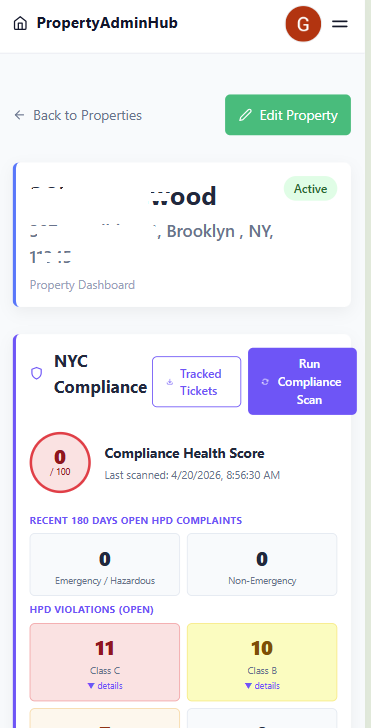
Navigate to Properties from the dashboard and open the property you want to work on. Scroll down to the NYC Compliance section. You will see:
- Compliance Health Score — a 0–100 score based on open violations
- Recent 180 Days Open HPD Complaints — Emergency/Hazardous and Non-Emergency counts
- HPD Violations (Open) — broken down by Class C, B, A, and I
- Tracked Tickets button — see all violations you are already tracking
- Run Compliance Scan button — pull the latest data from NYC Open Data
View HPD Violations and Click Track
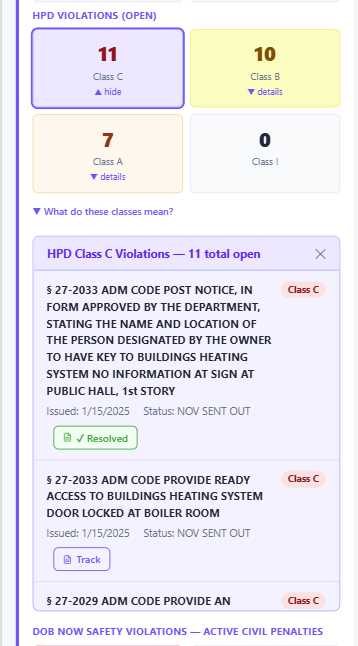
Click details under any violation class (e.g., Class C) to expand the list. Each row shows the full NYC administrative code citation, issue date, and current HPD status.
- Violations you have already resolved show a green ✓ Resolved badge.
- Violations not yet tracked show a Track button — click it to open the tracking page.
The Violation Tracking Page
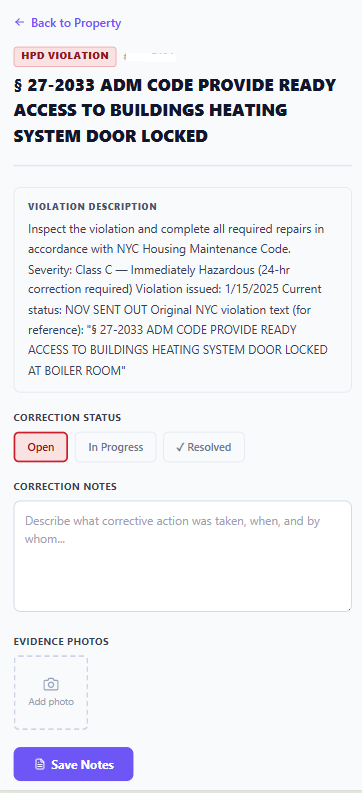
The tracking page opens with the full violation description pre-filled, including severity, issue date, and the original NYC code text. You will use this page to document your entire correction workflow.
The Correction Status has three stages:
- Open — work has not started yet
- In Progress — correction is underway
- Resolved — all corrective action is complete
Add Correction Notes
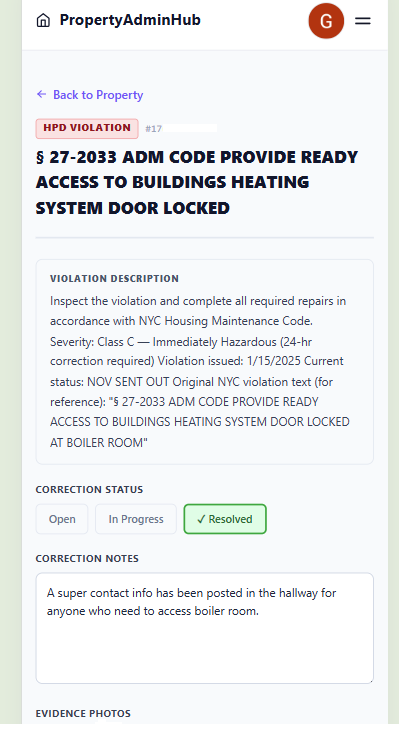
In the Correction Notes field, describe what corrective action was taken, when it was done, and who performed the work. Be specific — this text appears verbatim in the final Certification of Correction.
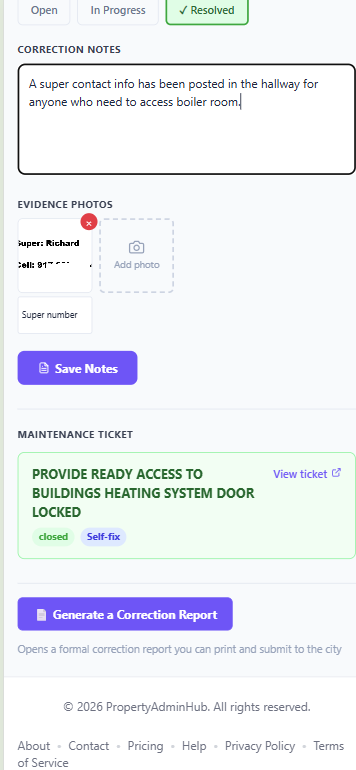
You can also upload a photo as evidence directly from the Evidence Photos section. For example, a photo of the posted super contact info, a repaired boiler room door, etc. Click Save Notes to save your progress.
Create a Self-Fix Maintenance Ticket
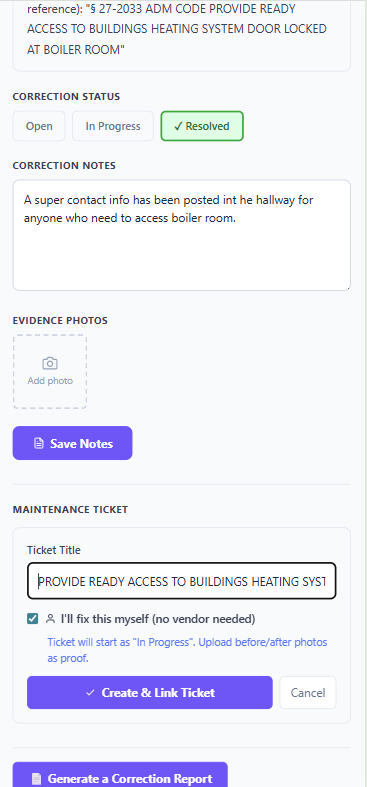
If you or your super are handling the repair without an external vendor, scroll to the Maintenance Ticket section and click Create & Link Maintenance Ticket. A form expands with:
- Ticket Title — pre-filled from the violation code (editable)
- I'll fix this myself (no vendor needed) checkbox — check this for self-fix tickets
Click Create & Link Ticket to create the ticket and link it to this violation.
View the Linked Ticket
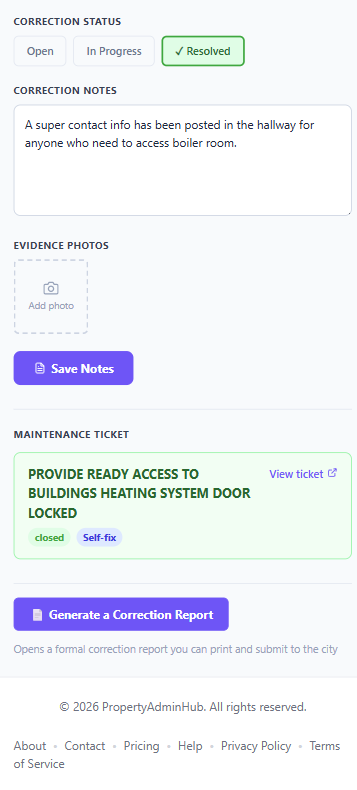
After creation, the Maintenance Ticket section updates to show the linked ticket in a green card with its current status (in progress) and type (Self-fix). Click View ticket to open the full maintenance ticket detail page.
Mark the Ticket Completed
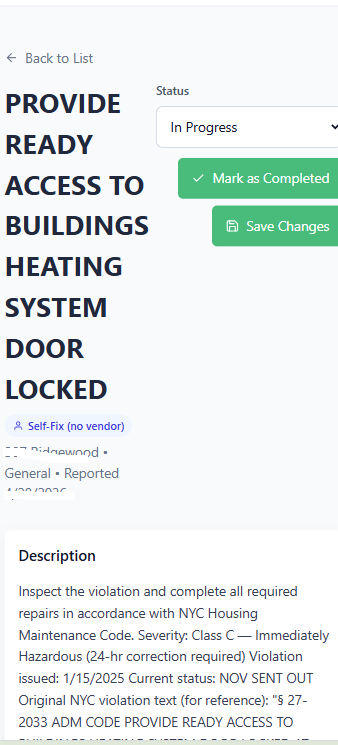
On the maintenance ticket page, once all repair work is done, click Mark as Completed. This closes the ticket and records the completion date.
Upload Evidence Photos
Return to the violation tracking page and upload before/after photos in the Evidence Photos section. Click each photo placeholder to add an image and optionally add a caption below it.
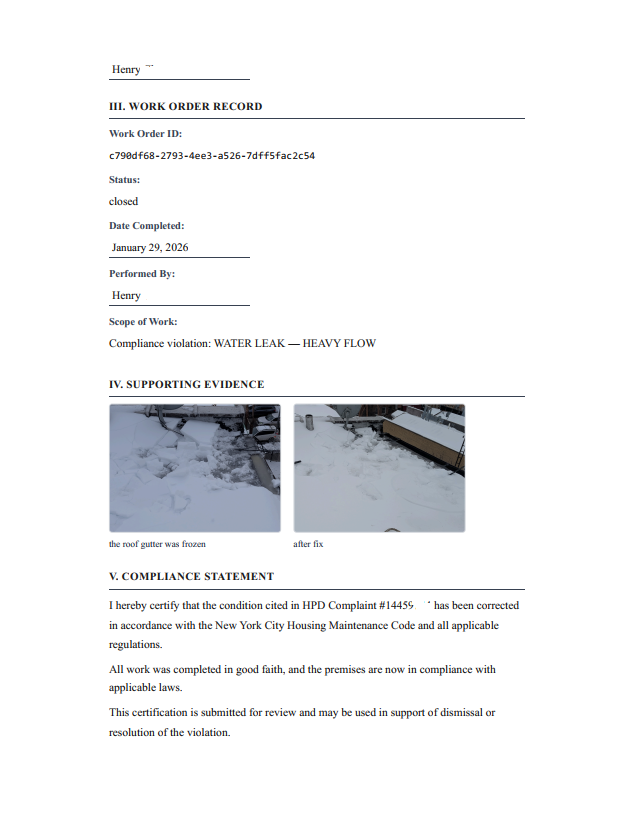
These photos are embedded directly into the Certification of Correction under Section IV — Supporting Evidence.
Change Correction Status to Resolved
On the tracking page, click the Resolved button in the Correction Status row, then click Save Notes. The button will turn green to confirm.
Generate the Certification of Correction Report
Click the purple Generate a Correction Report button at the bottom of the page. The report opens in a full-page preview showing:
- Property address and HPD Violation number
- Section I — Violation Details (cited condition and severity)
- Section II — Corrective Action Summary (your notes)
- Section III — Work Order Record (linked ticket data)
- Section IV — Supporting Evidence (uploaded photos with captions)
- Section V — Compliance Statement
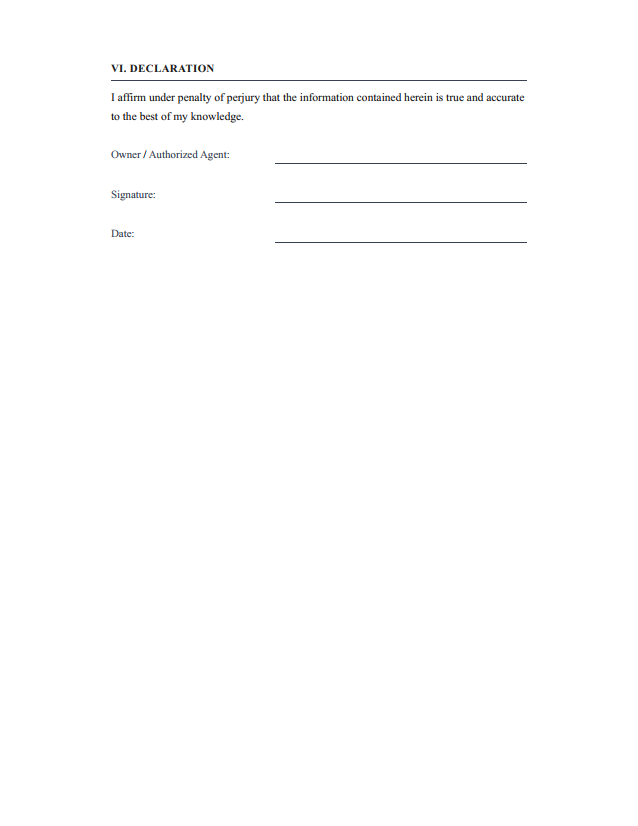
- Section VI — Declaration (signature lines for printing)
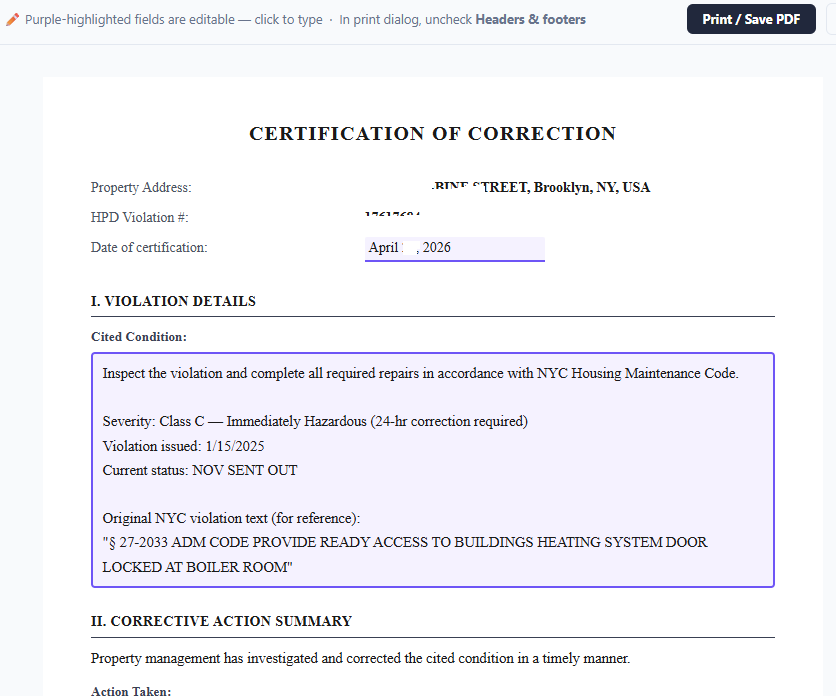
Print or Save as PDF
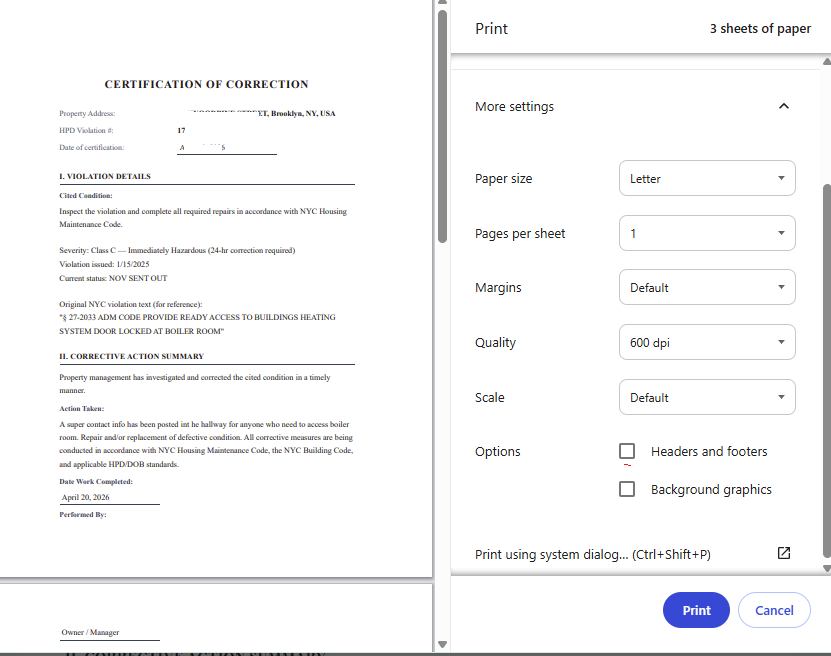
Click Print / Save PDF in the top-right corner. Your browser print dialog opens. The report is 3 sheets of paper.
For the cleanest output:
- Set Paper size to Letter
- Uncheck Headers and footers under Options
- To save as PDF: change the destination printer to Save as PDF
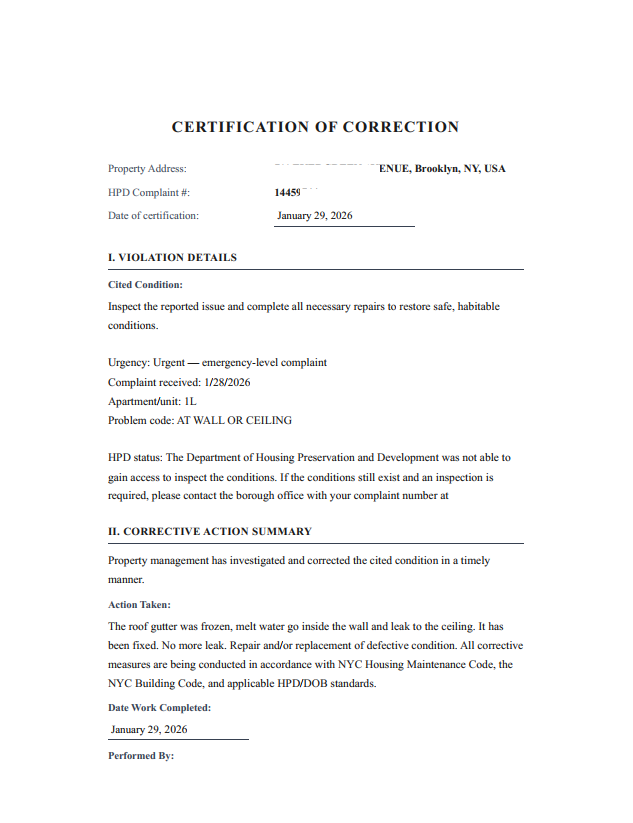
The Certification of Correction — All 3 Pages
Below is an example of the full 3-page document generated by PropertyAdminHub. Pages 1–2 contain the violation details, corrective action, work order record, evidence photos, and compliance statement. Page 3 contains the declaration and signature block for the owner or authorized agent.
Quick Reference — Common Questions
Can I track the same violation multiple times?
No. Each violation has one tracking record. You can edit notes and re-upload photos at any time before and after generating a report.
Do I need to assign a vendor?
No. The 'I'll fix this myself' option lets you create a Self-Fix ticket with no vendor needed. Only the ticket title and completion are required.
What if I haven't finished the work yet?
Leave the status as 'In Progress'. Do not generate the report until work is complete and the status is set to Resolved.
Can I regenerate the report after changes?
Yes. The Generate button can be clicked any time. Each click produces a fresh report from your saved notes and photos.
Where do I find previously tracked violations?
On the Property Dashboard, click the 'Tracked Tickets' button in the NYC Compliance section.